Make Something New Every Day


This blog is inspired by all those who love to cook, whether experienced or not, and who continue to experiment with new ideas & ingredients, and best of all, share their passion with others.

The first entries are recipes prepared by the students of Lionel Wilson College Preparatory Academy in Oakland, CA. Fifteen students with varying cooking experience participated in my weekly workshop (via Tutorpedia), and successfully prepared various meals, snacks, and baked goods as part of an after-school program.

Along with the recipes from that class, I will continue to add new seasonal items, spanning every genre of the culinary world, as well as a helpful list of links to recipes, instructional videos, and places to shop and volunteer in your area.

Feel free to ask me questions and share your recipes and ideas as well. I look forward to cooking with you.


Showing posts with label chocolate. Show all posts

March 18, 2019

The ONLY Gluten-Free Devil's Food Cake

When is a gluten-free cake acceptable by my standards? When I can't tell it's gluten-free. 

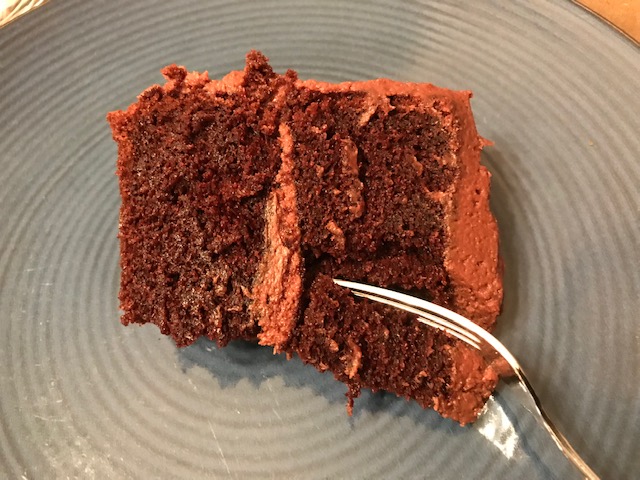
This is the first GF cake I've made that has the texture of a traditional devil's food cake. It is moist, very chocolatey, and has the right leavening to lift up the GF flours that can usually weigh cakes down. 

This recipe calls for hot brewed coffee to be mixed into the batter just before baking. Coffee helps bring out the flavor of the chocolate, but it can be substituted with decaf, cocoa, Pero, or simply hot water. 

This recipe makes two 8" rounds, which can serve anywhere from 8-12, and can easily be doubled to make two 10" rounds. 

I initially made a chocolate frosting, but the cake is sweet, and next time I will try a raspberry whipped cream.

Prep Your Pans
For chocolate cakes, I grease the pans very well with coconut oil, and dust the pans with sifted cocoa powder instead of flour. Then also line the pans with parchment rounds. 

Preheat the oven to 350'

For the Cake
1 3/4C all-purpose GF flour (I like Bob's 1:1)
2C granulated sugar
3/4C sifted cocoa powder
2t baking soda
1t baking powder
1t kosher salt

1C buttermilk
1/2C neutral oil (I like grapeseed oil)
2 eggs (I always use XL)
2t vanilla extract

1C hot coffee (or decaf, or cocoa made with water, or Pero made with water)

For the Frosting
1C softened unsalted butter
3C sifted powder sugar
1/2C sifted cocoa powder
1t vanilla extract 
1/4C heavy whipping cream

Make the Cake
Whisk together all the dry ingredients in a large bowl. In a separate bowl, whisk together the wet ingredients EXCEPT FOR THE COFFEE. Fold the dry into the wet. THEN stir in the coffee. Divide the batter between the two pans and bake for 35-40 minutes until a toothpick comes out clean, and the cake starts to come away from the sides of the pan. Cool in the pans on a wire rack for 5 minutes, then turn out onto cake boards to cool completely. The cakes can be made a day or two ahead and wrapped well in plastic wrap until ready to frost. 

Make the Frosting
Cream the butter in a bowl with a mixer until soft and fluffy. SLOWLY stir in the cocoa powder and powdered sugar until combined. Stir in the vanilla and whipped cream. Mix for a couple of minutes until fluffy, but don't overmix, as the cream will eventually look grainy. Frost the cake and serve!

Alternate Frosting: Raspberry Cloud Cream
1C raspberry puree
2/3C sugar
2.5t gelatin powder (or agar-agar)
2C heavy whipping cream (keep it cold, and chill the bowl for whipping)

Stir together the gelatin and 1/4C of the puree and gently heat over a bain marie until dissolved. Stir in the rest of the puree and sugar and cool to room temp. Whip the cream in the chilled bowl til firm. Fold in the puree. Frost your cake and serve immediately or chill until ready to serve. 

Note: The gelatin or agar-agar aren't absolutely necessary if you're going to frost and eat your cake immediately, but they do help keep the cream firm, and prevent the liquids from leaching out. 


January 15, 2018

Chocolate Almond Macaroons GF

My Mom discovered the recipe for these a long time ago, in a galaxy far, far away, and made them every year for Christmas. It was a BIG production. For the almond macaroon, we'd shell almonds, blanch them to remove the skins, dry them, and grind them to make the almond meal. The last few years, Mom was taking care of her Mom, and didn't have the bandwidth to make these. This year, I was fortunate to have a lot of time off around the holidays, so I volunteered to make them. And guess what? You can BUY organic ground almond meal at most stores with bulk sections. So that simplified things quite a bit to start. The rest may seem complicated or fancy, but most of these steps can be done ahead of time, allowing you to relax and enjoy time with your guests, while wowing them with these irresistibly delicious treats. 

If you make these ahead (which I recommend), do all the steps in one day, and freeze the macaroons, defrosting them about 20-30 minutes before serving (they're also really good frozen). As with any seemingly intimidating recipe, you have a greater chance of succeeding if you read through the recipe a few times first, and organize all your ingredients and tools ahead of time, visualizing each step. 

These (gluten-free!) macaroons have 3 components:
almond macaroon 
cocoa buttercream
dark chocolate coating

Let's start with the buttercream. I like the Neoclassic Buttercream recipe from the Cake Bible, as you don't need a thermometer for the sugar syrup, and it's a relatively quick and simple technique. We modified this recipe to use 3 egg yolks, so you don't waste any eggs, as the macaroon uses 3 whites. 

Before you start, make sure your butter is softened, but not melty. Here's what you'll need:

Cocoa Buttercream
3 egg yolks (I always use extra-large cage-free eggs)
1/4C + 2T sugar (only use white granulated sugar)
1/4C light corn syrup (you can find non-GMO at Whole Foods, etc.)
3/4C unsalted butter, softened (1 1/2 sticks)
3T cocoa powder, sifted 

Tools

  • Hand or stand mixer (I prefer a hand mixer for this small batch). 
  • Small sauce pan, preferably nonstick
  • Measuring cups, spoons 
  • Two small/medium mixing bowls, about the same size 
  • Tray of ice cubes (optional)

Method
Beat the yolks on medium-high until pale yellow and thick (about 5 minutes). 
Heat the sugar and corn syrup in the saucepan, stirring constantly with a wooden spoon or heat-proof silicone spatula, until the mixture comes to a roaring boil with large bubbles on the surface. 

With the mixer on low, VERY CAREFULLY pour the syrup in a thin stream into the egg yolks. 
AVOID pouring the syrup into the mixing blades, or the syrup will splatter on the sides of the bowl, harden, and you'll end up with crunchy bits in your smooth buttercream. Not the end of the world, but avoid it if possible. Start with a little syrup at first to temper the eggs so they don't scramble from the heat. Then continue quickly but carefully to pour in the rest of the syrup while beating on slow-medium. At this point you'll need to keep beating the mixutre for about 10 minutes until it cools to room temperature. You can speed up the cooling process by nesting the bowl in another bowl full of ice. Just keep moving that mixer around to make sure you're cooling the mixture evenly. Test the temperature by putting a dab on your lip. If it feels a bit cooler than your body temp, you can start adding the butter, 1T at a time, making sure it's completely mixed in before adding the next lump. Continue until all the butter is incorportated. 

Sift the cocoa powder over the buttercream, and mix in on low. You did it! Now you can set the buttercream aside while you make the macaroons. 
Preheat the oven to 375'.

Macaroons
3 egg whites
1.5C ground almond meal
1.5C powdered sugar, sifted

Tools

  • Stand mixer fitted with whip (or hand mixer). If you're using the same mixer as you did for the buttercream, be sure to wash it thoroughly with soap and hot water. Any oils left on the bowl or beaters can prevent your whites from firming up. You can also just make the macaroons first, and the buttercream second. 
  • Pastry bag (or gallon ziploc bag) fitted with a coupler (or you can use a teaspoon).
  • Baking sheets
  • Parchment sheets

Sift the powdered sugar into a large bowl. Whisk in the almond meal until there are no lumps. 
Beat the egg whites until stiff, wet peaks form (just until the peak holds). 
Fold in the almond sugar mixture 1/3 at a time. 


Immediately pour the batter unto your pastry bag. I use a binder clip to keep the batter from running out until I'm ready to pipe. If you're using teaspoons, line your baking sheets with parchment, and start dropping teaspoons of batter about 1" apart. 

Bake at 375' until deeply golden. Depending on your oven, you might want to turn the sheet around halfway through for even baking (my old oven has a hot corner).  You want the cookies good & golden because they are about to encounter a lot of moisture, and need that crunch to stand up to it. Ovens vary, but each batch should take about 15-18 minutes. Cool the cookies on cooling racks. Then gently peel each cookie from the parchment, and flip it over so the flat side is facing up. 

Assembly
Using a teaspoon, spread a mound of buttercream on each cookie, leaving a smooth-ish surface. Once all the cookies are all coated, freeze them for about 30 minutes. This way the buttercream won't melt into the chocolate when you're dipping them. 

Melt about 5oz finely chopped dark chocolate in a double boiler, or as I do, boil a couple inches of water in a sauce pan, and set the bowl of chocolate over it to melt. The water should not touch the bottom of the bowl. The steam will gently melt the chocolate, but DON'T LET ANY WATER GET INTO THE CHOCOLATE. It will seize up and harden. (If that happens, you can add 1T of honey to help remelt it.)

Once the chocolate is melted, remove the bowl from the heat, and set it on the counter next to your macaroons. Now, dip away! Hold onto the sides of the macaroon, dip it into the chocolate, then lift it up, bounce it on the surface of the chocolate, and shake of the excess. Set the dipped macaroons back on the sheet with parchment. Once they're all dipped, but them back in the freezer. Store macaroons for up to a month in an airtight container. 


Христос рождается!

October 31, 2015

Triple Chocolate Brownies - ATK


 With just the right balance of cakey & chewy, and three types of chocolate keeping the sweetness in check, these babies hit on all cylinders. They're best eaten the same day as baked (the chocolate chunks stay melty), but keep beautifully in an airtight container for up to 4 days. 

Prep the Pan
Make a foil sling for a 13x9" baking pan by folding two long sheets of aluminum foil; the first sheet should be 13" wide, and the second sheet should be 9" wide. Lay sheets of foil in the pan perpendicular to one another, with extra foil hanging over edges of the pan. Push foil into corners and sides of the pan, smoothing the foil flush to the pan. Grease the foil, and set the pan aside. 

Why should I do this? Sounds like a pain. 
The foil will keep the brownies from getting too dry. After cooling the brownies in the pan, you can lift them out by the foil edges, then easily cut them. 

This is one of those recipes that pays to have all the ingredients ready in advance of mixing. 

Get it Together
1/3C unsweetened cocoa powder
1 1/2t instant espresso (optional, but recommended)
1/2C plus 2T boiling water
2oz unsweetened chocolate, chopped fine 
1/2C plus 2T vegetable oil 
4T melted unsalted butter
2 large eggs plus 2 yolks (use the extra whites to make these!)
2t vanilla extract
2 1/2C sugar
1 3/4C flour
3/4t salt 
6oz bittersweet chocolate cut into 1/2" pieces 
Trader Joe's carries unsweetened baking chocolate, as well as cocoa powder and bittersweet chocolate.
Their cold-pressed sunflower seed oil is ideal for baking. 


Preheat the oven to 350'. 
Whisk together the flour and salt. Set aside. 
In a large bowl, whisk the cocoa and espresso powders with the boiling water. Add the unsweetened chocolate and whisk until melted. 
Whisk in the melted butter and oil. The batter may separate. 
Whisk in the eggs & yolks, one at a time. Now the batter should look like chocolate pudding. 
Whisk in the vanilla extract, then the sugar.
Switch to a spatula and stir in the flour, then the bittersweet chocolate chunks.
Pour the batter into the prepared pan and bake for 30-35 minutes until a toothpick comes out with moist crumbs. 

Yes, you have to do this, or they won't set properly.
In order to get the right balance of chewy and cakey, brownies tend to be slightly underbaked. Allowing them to cool completely before cutting, ensures they set so you get that fudgy center, cakey outside, and crisp crust. 

Cool the brownies in the pan on a wire rack for 1 1/2 hours. 
Then lift the brownies out of the pan by the foil edges, and allow to cool on the wire rack for another hour. 
Cut brownies into 24 pieces and serve. 
Store in an airtight container for up to 4 days. 

на здоровья! 


Recipe by America's Test Kitchen


November 10, 2011

Warm Clouds of Heavenly Chocolate: Gluten Free!

Even after baking for over 30 years (yes, I count my childhood cookie baking as experience), I never fail to be amazed by what eggs+chocolate+sugar can produce. These cookies have no flour, and the only fat is from the chocolate (bittersweet has less than 12%), but they are surprisingly rich and cakelike.
This recipe is very basic, and success is imminent if you follow my tips. As usual, my instructions are detailed, and for beginner/ intermediate cooks. More experienced bakers can skim over the details if they wish.

MISE EN PLACE
6 ounces bittersweet chocolate, chopped finely
2 large egg whites
1/8 teaspoon cream of tartar
1/4 cup sugar
1/2 teaspoon vanilla extract

Melt the chocolate in a double boiler. You can make your own double boiler by fitting a bowl over a pot of about the same width. Fill the pot with about 2" of water. Place the bowl of chocolate over the pot. The bowl should sit inside the pot, with plenty of room between the bottom of the bowl and the water. DO NOT GET ANY WATER IN THE CHOCOLATE. It will make the chocolate seize up and harden, rather than melt smoothly.

Once the water in your double boiler comes to a boil, turn down the heat to a simmer. There will be enough heat from the steam under the bowl to melt the chocolate. Once the chocolate is melted, turn off the heat, and stir the chocolate to melt any lumps.
When dividing your eggs, make sure not to break the yolks. If yolks or any fat gets into the whites, they will not beat into stiff peaks, which you need for a successful cookie.
Beat the whites in a clean, dry bowl until foamy. Add a pinch of cream of tartar to help stabilize the whites. Continue beating until soft peaks form when you lift the beater out of the whites. Sprinkle the sugar over the whites, and continue beating until the whites look glossy and the beater forms stiff peaks when lifted out of the whites. (Slowly lift the beater straight up out of the whites. The whites should make a point that doesn't droop over - see photo.) Overbeating the whites will dry them out, giving you a drier, airier cookie. Beating the whites to just the right point will result in a soft, cake-like center. This is a technique you will learn over time.

TIPS FOR "PEAK" EGG WHITE SUCCESS
  • Keep your eggs at room temperature (at least 1 hour before baking).
  • Be careful when separating the yolks from the whites. Don't break the yolks!
  • Add a pinch of Cream of Tartar to help stabilize whites.
  • Use a medium-high setting on your mixer, and be patient. Before you know it, you'll have stiff peaks!
Stir in the vanilla extract. Use a folding motion to combine the chocolate with the whites, and always move the spatula in the same direction (down through the whites, and around the bowl). Fold the ingredients until just combined (when you don't see any more white streaks).
For best results, line baking sheets with parchment. Do not grease the baking sheets. Use a small ice cream scoop (a little smaller than a golf ball) with quick-release handles for ease, and evenly sized cookies. If you don't have a scoop, use 2 spoons - 1 to scoop the batter, and the other to scrape the batter onto the sheet.
Bake at 350' for about 12-15 minutes. All ovens seem to bake differently, so check after 12 minutes. Gently touch the top of a cookie. If it feels set & has a crust, it should be done. Taking the cookies out too early might make them collapse (they're like meringues in that way).

If all goes well, your cookies should have a light, cakey texture inside. Store cooled cookies in an airtight container for up to one week. They are delicate, so transport them in a structured container rather than a bag.

For a variation, replace the vanilla extract with peppermint, orange, or almond extract. These tend to have a much stronger flavor, so use 1/4 teaspoon or less.

You can double the recipe, but may loose some volume in the process. I get better results by making the recipe twice. One recipe makes about 24 cookies.

March 30, 2010

Lost in Chocolate Weekend


Chocolate in San Francisco may sound like old hat, but the double-dipped weekend of the International Chocolate Salon and Chocolate Cookie-Themed SF Food Wars proved to be anything but.

Reasons for attending a luxury chocolate trade show are as vast as the offerings to be found there. Vendors hope to increase product awareness, while event goers from seasoned food critics to wide-eyed children basically want to taste something yummy. Walking toward Fort Mason’s Festival Pavilion I imagined a ride down the creamy river in Charlie and the Chocolate Factory, mug in hand, paddle cast aside.

Spotting celebrity chef Elizabeth Falkner of Citizen Cake and Orson Restaurant, made the day for at least one young pastry chef. Hilda Casey of Beaux Gateaux and Confections by Kay Dillon gasped as Falkner walked up to their table. “She is the sexiest chef out there.” Perhaps this sighting brought luck to the first-time event goers. Kay’s beautiful handmade chocolates won an award for Best Gift Set.

Amidst the sea of chocolate were several well known Bay Area companies. The popular, Kika’s Treats, of San Francisco, won prizes across the board. Bridge Brands, also of San Francisco, sponsored the next day’s SF Food Wars Chocolate Cookie Competition by donating 2 pounds of dark chocolate for each competitor to use in their entry.

Day 2: Of Course You Realize, This is Food Wars…

Having paced myself the day before, I was now ready to eat and judge 20 different chocolate cookies at SF Food Wars. Unlike the Chocolate Salon, where you can pick and choose your samples, a participant of SFFW must try all 20 samples to truly vote democratically.

Maybe it was the sugar. Maybe it was the house music pumping away in a dark club on a Sunday afternoon. Maybe it was the stream of chocolate that tied it all together. But after sampling 20 chocolate sugar bombs within about 15 minutes in that environment, I was ready to jump ship. SFFW is a good time with a good cause (proceeds benefit the SF Food Bank), but I look forward to future events with more diverse themes, the next being brunch.


Eating food and writing about it is a tough job…
Wait, no it isn’t.

‘til next time…