Make Something New Every Day


This blog is inspired by all those who love to cook, whether experienced or not, and who continue to experiment with new ideas & ingredients, and best of all, share their passion with others.

The first entries are recipes prepared by the students of Lionel Wilson College Preparatory Academy in Oakland, CA. Fifteen students with varying cooking experience participated in my weekly workshop (via Tutorpedia), and successfully prepared various meals, snacks, and baked goods as part of an after-school program.

Along with the recipes from that class, I will continue to add new seasonal items, spanning every genre of the culinary world, as well as a helpful list of links to recipes, instructional videos, and places to shop and volunteer in your area.

Feel free to ask me questions and share your recipes and ideas as well. I look forward to cooking with you.


June 14, 2012

Adam & Eve on a Raft...Psych!


Light & crisp cornmeal pastry. Vanilla bean custard. And the star? A warm, tender, perfectly ripe apricot. I ate my first apricots of the season today, and my thoughts went straight to this utterly addictive treat. Make your dough and pastry cream the day before to save time in the morning. Then just roll your dough, top with pastry cream and apricots, and bake! 

The Dough

1 1/2 cups flour
6T corn meal
1/2t salt
2t sugar, + extra for baking
5T sour cream
7T water
10 1/2T butter, chilled (1 stick + 2 1/2T)
eggwash (1 egg, lightly beaten with a bit of water)

Mix the dry ingredients (1st 4) together in a bowl. Combine the water & sour cream in a bowl, and set aside. Cut the chilled butter into small cubes, and cut into the dry mixture using a pastry cutter, a fork, or quick pulses in a Cuisinart. Slowly mix in the wet ingredients until a dough is formed. You may not need to use all of it. Doughs will form differently depending on the amount of humidity in the air. Wrap the dough in plastic, and chill for at least 2 hours, or overnight. 


The Pastry Cream

3 yolks
1/3 cup sugar
2T corn starch
1 cup + milk
vanilla bean

Split a vanilla bean, scrap out the seeds. Put the seeds in the sugar, and the pod in your milk. Heat a little more than 1 cup of milk until just scalded. Whisk together the yolks, sugar, and cornstarch. Stabilize your bowl of yolks with a towel or rubber mat. Whisk in the hot milk VERY quickly (or you'll get scrambled eggs). Remove the vanilla pod, and pour the mixture back into the pot from the milk. Stir over medium heat until thick. It will thicken very quickly because of the cornstarch, so whisk constantly, and don't walk away. As soon as it starts to thicken (you can see the lines the whisk leaves), turn off the heat and pour the custard into a clean bowl. It will continue to thicken as you  pour it out, so work quickly, using a spatula to get it all out. Let it cool at room temperature for about an hour, then cover with plastic and chill until set. 

Ready to Roll?

Preheat your oven to 400'. Wash & dry 4 perfectly ripe apricots, and slice them in half lengthwise. Cut the dough into 4 equal pieces. Keep the reserved dough covered and chilled as you roll. Roll each piece of dough into an oval, about 1/8" thick. Spread some pastry cream onto each oval, keeping the edge clear about 1/2" for crimping. Create a border for each tart by folding in the dough onto itself, all the way around. Using a thin spatula, place each tart onto a baking sheet lined with parchment. Brush the crimped edge of each tart with the eggwash. Place 2 half apricots onto each tart (so it looks like 2 fried eggs). Sprinkle some of the extra sugar around the edge of the tart (over the eggwash). 

Bake at 400' until the pastry is golden on the edges and the bottom. Allow to cool on a wire rack for at least 20 minutes before serving. 

Bring these to an outdoor concert, a picnic or brunch, and your friends will forever sing your praises. Hurry up, before apricot season is gone! 


February 9, 2012

Black & Blue Gluten-Free Berry Muffins

I've made these muffins for years, usually with all-purpose flour, and a mix of fresh blueberries and raspberries.

Last night I was making them for work, so I used the organic berries I had (black & blue), and substituted the all-purpose flour for a gluten-free blend, so my GF friend could have one too.

The texture was nice & light, but I think the garbanzo bean flour has a sour aftertaste that I'm not fond of. I've used it in my Blackberry Tart recipe with great results, but for muffins, which require a lot of flour, I may opt for a different GF blend next time.

Still, these are very simple and quick to make, and can use a variety of berries and flours.

This recipe makes 18 muffins, using about 1/3 Cup of batter per muffin. Line muffin tins with paper baking cups. If the cups are really compressed, gently stretch them so they hold more batter.

Preheat oven to 350'.

The Dry:
3 Cups All-Purpose OR Gluten-Free Flour
2/3 Cup Sugar
1 Tablespoon Baking Powder
1/4 Teaspoon Salt
1 Tablespoon Lemon Zest (from 2 lemons)

The Wet:
1 Cup Lowfat Milk
2/3 Cup Oil (I like grape seed. Do NOT use olive oil.)
2 Eggs
The Berries:
2 Cups of Fresh or Frozen Berries (I usually like rasp & blue)

Whisk the wet well, and gently fold into the dry. Fold in the berries, trying not to let them bleed into the batter. Scoop into tins and bake about 20 minutes, or until firm to the touch. Allow to cool, and dust with powdered sugar right before serving. Enjoy!

November 19, 2011

Gorgeous Gruyere Gougeres

What appetizers should I serve at Thanksgiving? This is a tricky subject, as you want items that are not terribly filling, but are jaw-droppingly drool-inducing. The answer? Cheese puffs. I make these bad boys twice a year (for the holidays and Easter). The dough is simple to prepare, but the piping takes a while since the recipe yields about 150 puffs. This is a good thing because you can freeze half of them and reheat them for holiday parties in December. Make them ahead of time and save your oven, and your energy, for other dishes on Thanksgiving Day. 
 
MISE EN PLACE
8 eggs at room temperature (+ 1 extra for an egg wash)

2/3 cup whole milk (+ 2 tablespoons for later...)
1 1/3 cup water
1 cup (1/2 #) unsalted butter
Salt (about 2-3 teaspoons, depending on how salty your cheese is)
Freshly ground pepper
1/2 teaspoon freshly ground nutmeg
2 cups flour

2 cups finely grated Gruyere cheese (about 1/2#) (the one from Trader Joe's is good & cheap)
1 tablespoon chopped fresh dill
2 tablespoons chopped fresh parsley
3 tablespoons chopped green onion

THE PATE CHOIX
In a 4 Qt. heavy pot (Le Creuset) heat the milk, water, and butter until boiling, and the butter is melted. Add the salt, pepper, and nutmeg. Remove from heat, and stir in the flour. The dough will form into a nice, clean ball. Move back onto medium heat and stir for about a minute to cook out the raw flour taste.
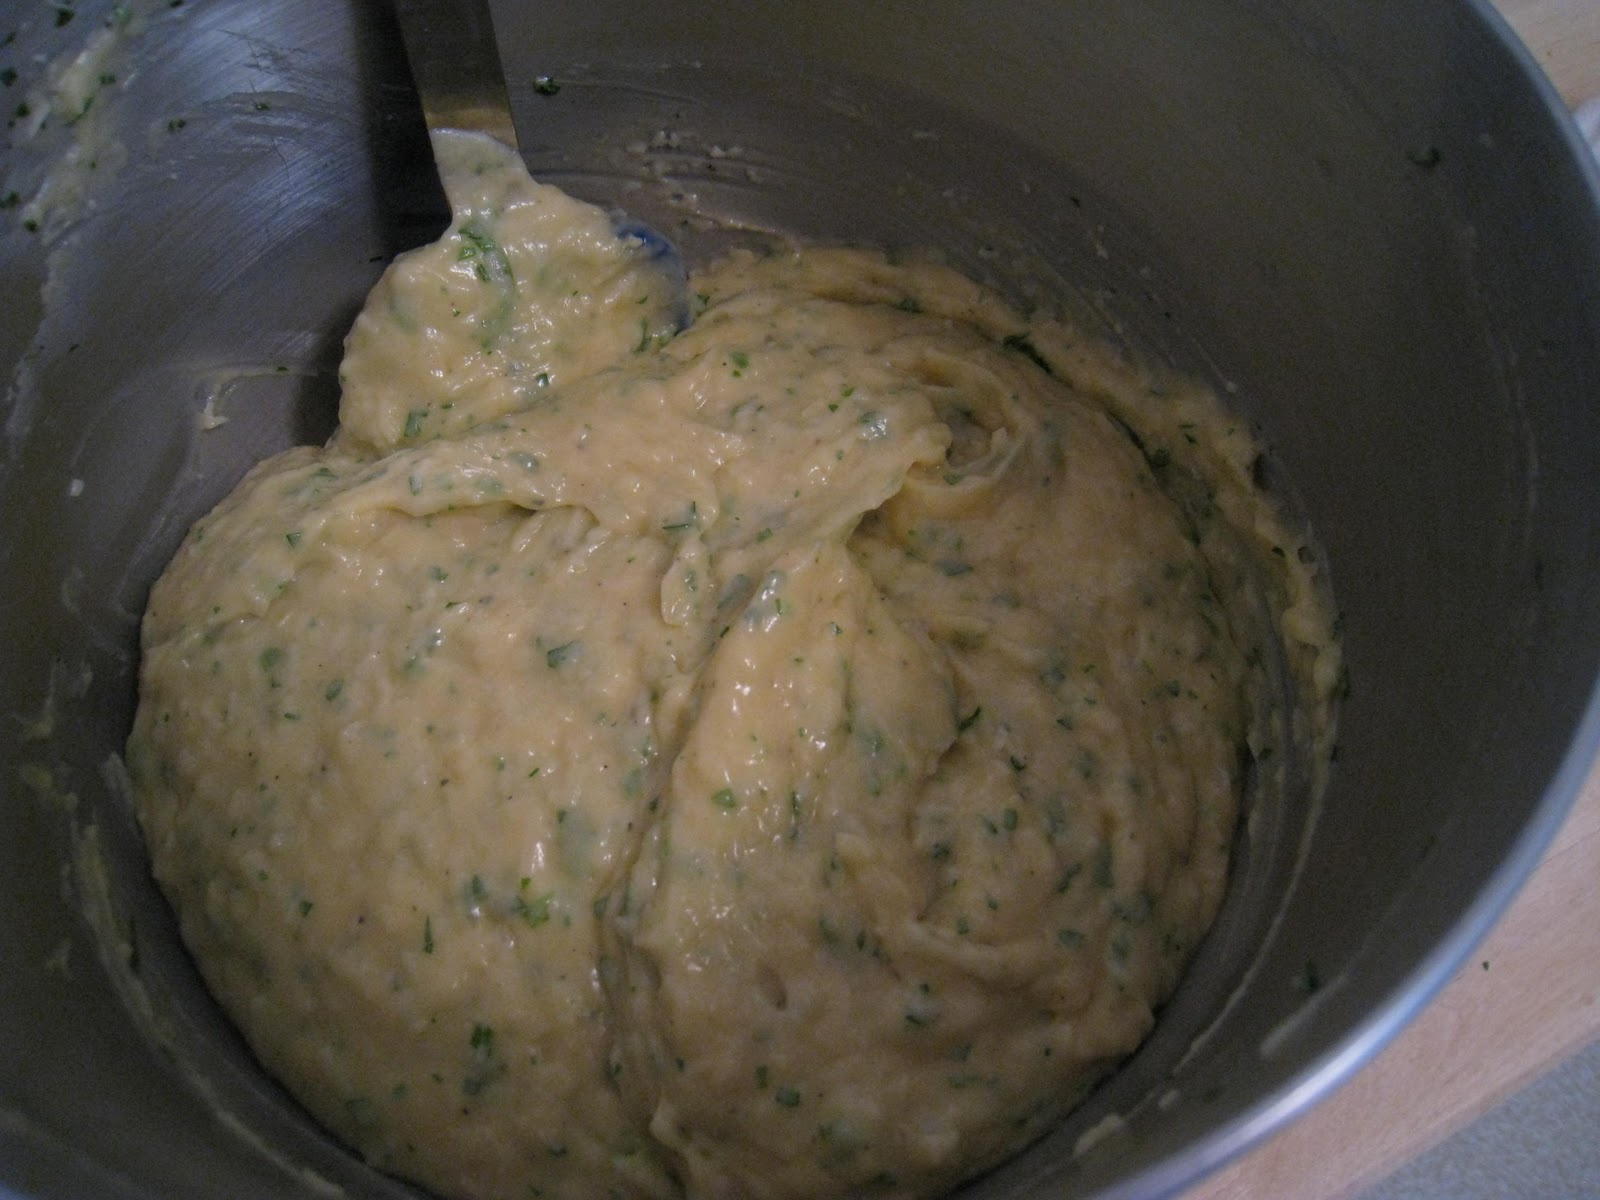
Dump the ball of dough into a mixing bowl. Beat in the 8 eggs, one at a time, waiting for each one to be incorporated before adding the next. Stir in the 2T cold milk, the grated cheese, and the fresh herbs.
Fit a pastry bag (or gallon size ziploc bag) with a coupler. Fill the bag about halfway with some dough, and pipe even balls onto a parchment lined baking sheet (about the size of a quarter, 1" apart from each other). The trick to piping is to stop squeezing the bag as you twist the tip away from the ball of dough.

Brush the tops of the balls with an egg wash, and bake at 400' for about 15-20 minutes. The puffs should be nice & brown on top. Serve immediately, or store cooled puffs in freezer bags for up to 3 months. Reheat in a 350' oven for about 5 minutes.
IMPORTANT
To make sure your cheese puffs are delicious, sample at least 3 from each batch. This could go on & on, but I have faith in your dedication.

MORE ABOUT PATE CHOIX
This versatile dough is the foundation for many baked goods. A sweet version is used for eclairs, profiteroles, and can also be fried to produce a varied result. The process is simple, but its success can be easily altered by glossing over tried & true techniques. If you have any questions about this, or any other recipe, please drop me a line, and I'll do my best to help you out.

November 10, 2011

Warm Clouds of Heavenly Chocolate: Gluten Free!

Even after baking for over 30 years (yes, I count my childhood cookie baking as experience), I never fail to be amazed by what eggs+chocolate+sugar can produce. These cookies have no flour, and the only fat is from the chocolate (bittersweet has less than 12%), but they are surprisingly rich and cakelike.
This recipe is very basic, and success is imminent if you follow my tips. As usual, my instructions are detailed, and for beginner/ intermediate cooks. More experienced bakers can skim over the details if they wish.

MISE EN PLACE
6 ounces bittersweet chocolate, chopped finely
2 large egg whites
1/8 teaspoon cream of tartar
1/4 cup sugar
1/2 teaspoon vanilla extract

Melt the chocolate in a double boiler. You can make your own double boiler by fitting a bowl over a pot of about the same width. Fill the pot with about 2" of water. Place the bowl of chocolate over the pot. The bowl should sit inside the pot, with plenty of room between the bottom of the bowl and the water. DO NOT GET ANY WATER IN THE CHOCOLATE. It will make the chocolate seize up and harden, rather than melt smoothly.

Once the water in your double boiler comes to a boil, turn down the heat to a simmer. There will be enough heat from the steam under the bowl to melt the chocolate. Once the chocolate is melted, turn off the heat, and stir the chocolate to melt any lumps.
When dividing your eggs, make sure not to break the yolks. If yolks or any fat gets into the whites, they will not beat into stiff peaks, which you need for a successful cookie.
Beat the whites in a clean, dry bowl until foamy. Add a pinch of cream of tartar to help stabilize the whites. Continue beating until soft peaks form when you lift the beater out of the whites. Sprinkle the sugar over the whites, and continue beating until the whites look glossy and the beater forms stiff peaks when lifted out of the whites. (Slowly lift the beater straight up out of the whites. The whites should make a point that doesn't droop over - see photo.) Overbeating the whites will dry them out, giving you a drier, airier cookie. Beating the whites to just the right point will result in a soft, cake-like center. This is a technique you will learn over time.

TIPS FOR "PEAK" EGG WHITE SUCCESS
  • Keep your eggs at room temperature (at least 1 hour before baking).
  • Be careful when separating the yolks from the whites. Don't break the yolks!
  • Add a pinch of Cream of Tartar to help stabilize whites.
  • Use a medium-high setting on your mixer, and be patient. Before you know it, you'll have stiff peaks!
Stir in the vanilla extract. Use a folding motion to combine the chocolate with the whites, and always move the spatula in the same direction (down through the whites, and around the bowl). Fold the ingredients until just combined (when you don't see any more white streaks).
For best results, line baking sheets with parchment. Do not grease the baking sheets. Use a small ice cream scoop (a little smaller than a golf ball) with quick-release handles for ease, and evenly sized cookies. If you don't have a scoop, use 2 spoons - 1 to scoop the batter, and the other to scrape the batter onto the sheet.
Bake at 350' for about 12-15 minutes. All ovens seem to bake differently, so check after 12 minutes. Gently touch the top of a cookie. If it feels set & has a crust, it should be done. Taking the cookies out too early might make them collapse (they're like meringues in that way).

If all goes well, your cookies should have a light, cakey texture inside. Store cooled cookies in an airtight container for up to one week. They are delicate, so transport them in a structured container rather than a bag.

For a variation, replace the vanilla extract with peppermint, orange, or almond extract. These tend to have a much stronger flavor, so use 1/4 teaspoon or less.

You can double the recipe, but may loose some volume in the process. I get better results by making the recipe twice. One recipe makes about 24 cookies.

October 24, 2011

Yellow + Blue = Grins

Yellow? That's the color of this super simple, uber delicious soup (Vitamin A!). Blue? That's me. Grins? One taste & that's all you'll see.

This sweet potato & split yellow pea pureed soup recipe is adapted from one Whole Foods posted about a week ago. I'm sure their vegan version would be just fine, but a few basic alterations make the flavor soar.


My Way is the High Way
8 cups+ low-sodium chicken broth (Trader Joe's brand or Swanson Natural Goodness are best, short of homemade)
1 tablespoon each, olive oil and butter
1 large onion, diced
1 tablespoon ginger, grated or chopped fine
2 cups dry yellow split peas
2 medium sweet potatoes (Hannah variety), diced 1/2" thick (about 2 1/2 cups)
1/4 teaspoon ground nutmeg
Sriracha or Cholula hot sauce
salt & pepper
toasted pumpkin seeds (pepitas) for garnish
(Hannah Sweet Potatoes)
Heat the oil & butter in a large soup pot. Saute the onion until translucent. Stir in the ginger & heat through. Add the sweet potato, peas, and 8 cups of broth. Season with about 2 teaspoons kosher salt (sea salt is saltier, so better to add a little now & more later if needed) and about 1/2 teaspoon of pepper.

Bring to a boil, then simmer covered for 1 hour, or until peas are soft. Puree with an immersion blender, or carefully transfer to a blender in batches, and puree until smooth. BE CAREFUL - it's very hot. Add more broth or water to thin out the soup. Adjust the seasoning with nutmeg and hot sauce. Serve with toasted pepitas for added flavor and texture. Goes great with my jalapeno corn bread!

Soup will continue to thicken as it cools. Cool before storing in the refrigerator, or freeze for up to 6 months. Boil to reheat, and thin with more broth or water as needed.

Enjoy!

(photo from Whole Foods)

October 6, 2011

Gnoc-Gnoc-Gnocchi at Heaven's Door

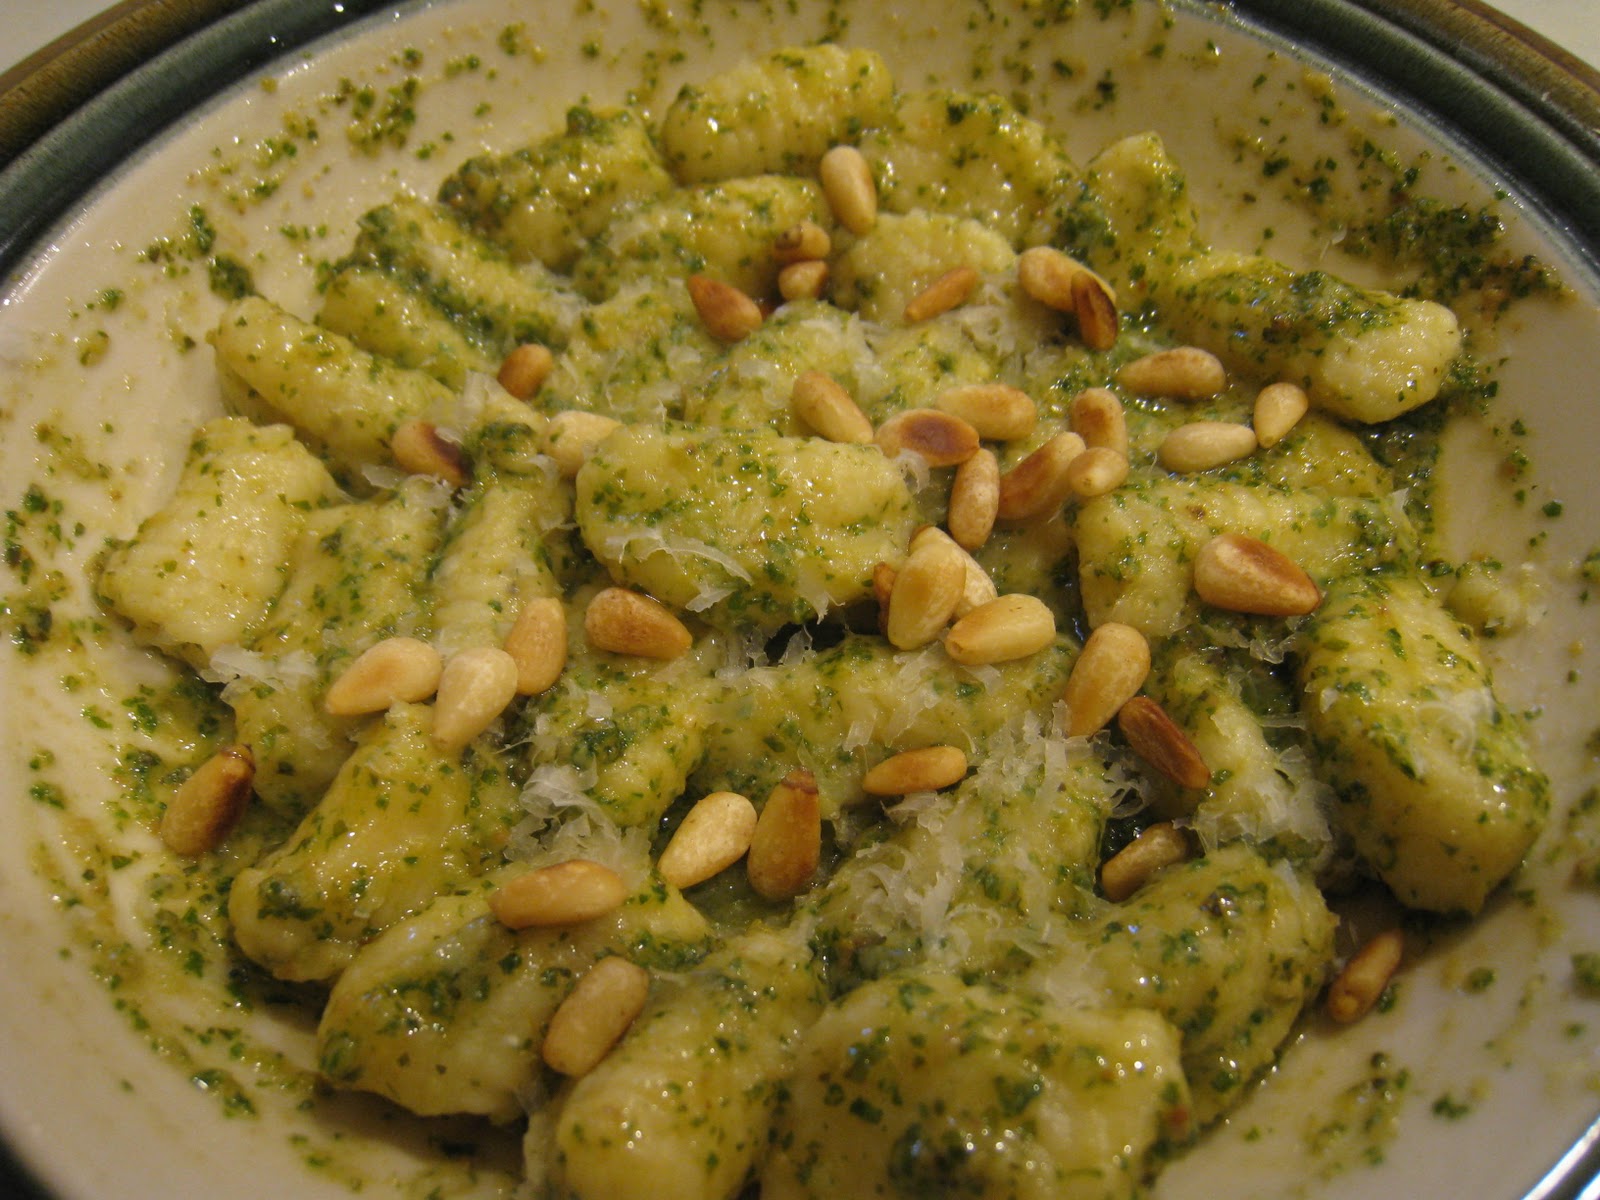
Part Deux of my Rainy Day Woman Homage to Deliciousness is homemade gnocchi with pesto. This is my 3rd attempt at gnocchi, and I nailed it. The recipe I used has very good instructions, but since I don't have a Nona to show me the light (and perhaps you don't either), I wanted to add some helpful photos & a few extra tips that made a big difference in my results.

Here Are My Top 5 Tips for Good Gnocchi

  1. Work with confidence. Reading through the recipe and staying organized will keep you ahead of the game. If you execute each simple step, you will get a great final product.
  2. Set out all of your ingredients ahead of time. Once the potatoes are cooked, you'll want to work quickly to combine the dough and shape the gnocchi.
  3. Steam adds unwanted moisture. Let the riced potatoes cool a bit before mixing in the other ingredients. You can use less flour this way, resulting in light, tender dumplings.
  4. When shaping the gnocchi, keep your hands, work surface, and tray floured to prevent sticking.
  5. Freezing the gnocchi before cooking helps. Make sure you have a large roomy pot of salted boiling water, and let them cook for a full 2 minutes once they rise to the surface. Keep the tray in the freezer and cook the gnocchi in batches.
Cooling the riced potatoes on the counter.
A well in the potatoes, filled with yolks, cheese, and seasonings.
Using a bench scraper to quickly & cleanly combine the ingredients.
Once the flour is added, test the dough for firmness. It should give slightly & hold its shape. Only use enough flour to get to this point. 
Separating the dough into 1/4s, rolling it out, and cutting even pieces.
Roll each piece on a gnocchi board, or use the back of a fork using a "somersault" motion. Dust with flour to prevent sticking.
The crevice in the gnocchi helps it cook quickly & remain tender. Freeze on a floured tray. Don't crowd them. 

Here is the recipe I used. It has terrific instructions. I hope my tips & photos help you achieve the same success I did. Good luck! (Makes 3-4 servings)

http://www.foodnetwork.com/recipes/michael-chiarello/potato-gnocchi-recipe/index.html

Pesto
1 cup of washed & dried basil leaves
2 cloves of garlic, pressed
3 tablespoons toasted pine nuts
1/4 cup grated parmesan cheese
olive oil
salt & pepper

Using a mini-prep or blender, pulse the basil leaves & garlic until finely minced.
Add the pine nuts and cheese, and drizzle liberally with olive oil (about 3 tablespoons to start)
Blend, and check the consistency. Add more oil until you get a pesto.
Season with salt & pepper.
Either refrigerate in an airtight container for up to one week, or freeze in ice cube trays, then transfer to a freezer bag. Defrost cubes of pesto as desired.

Makes about 3/4 cup

Pitter-Pat Rice Patties (Glorious Leftovers for a Rainy Day)

It is a universal (to me) truth that the more I have to do, the more I will take on. Somehow in the ADD din, this comforts & makes sense to me. Today I am committed to many projects, including making gnocchi, & finishing a costume for SFBP tomorrow night.

So what do I do? Make a delicious brunch, of course! Since it's raining, I wanted something hot, & luckily this meal was simple to prepare. The hardest part was stopping to take photos before I ate.
I've seen several variations on how to turn leftover rice into a tasty hot patty, but I think the one I made up worked very well. I used just enough egg to bind the rice together, and a little cheese to add creaminess and character. Depending on what kind of rice you have, add complimentary ingredients & moisture as needed. Goat cheese would make an amazing binder for these cakes. Instead of mixing it into the batter, I would hide a dollop of it inside each patty, or let it melt on top of the fried patties.

I started with leftover yellow curry rice. I make this rice often & eat it with diced tomato, avocado, salt & pepper. See recipe for rice below. Since this blog is about the leftovers, I will start with the patty recipe.


To Make the Rice Cakes
2 cups leftover curried rice
2 large eggs
1/2 an onion, diced
1/2 cup grated parmesan cheese (or goat cheese if you have it)
1/2 cup chopped fresh flatleaf parsley
Sriracha or other hot sauce
salt
pepper
butter
olive oil

Saute the diced onion in some butter & oil until brown & caramelized. Take about 1/2 cup of the rice along with the cooked onions, and blend them in a mini prep or blender until somewhat emulsified. This step is not necessary, but will add a creamier texture to your patties.

Combine the rice, eggs, rice/onion mixture, parmesan cheese, most of the parsley (leave some for garnish), in a bowl. Season as desired with hot sauce, salt & pepper. Since the eggs are raw here and I can't taste, I go easy on the salt & sprinkle a bit more on before frying.

Form into patties and refrigerate for about 20 minutes (also can be left overnight, but who can wait that long?) Chilling will help set the patties and ensure they stay together when flipped.
Heat the pan from your onions, and add more butter. Once it starts to sizzle, add the patties and fry for 4-5 minutes on each side. You want a nice crispy crust on these, so be patient and only flip once.
I served these with a fried egg on top, extra hot sauce & parsley. Aside from adding color, the parsley kicked the flavor into high gear.
A hot cup of cardamom coffee is a delicious accompaniment to this dish. Simply add a 1/2 teaspoon of ground cardamom to 2 packed tablespoons of grounds. Makes 3-4 cups, depending on how strong you brew it.


To Make Yellow Curry Rice
Boil 1.5 cups of water and set aside.
Measure 1 cup dry white rice (I find that jasmine, or any regular medium-grain rice works well)
Heat 1 tablespoon butter in a quart-sized saucepan (one that has a lid)
Stir in the rice, & add 1 tablespoon yellow curry (I like the Sun Brand Madras Curry), 1/2 teaspoon ground cumin, and 1 teaspoon salt.
Pour the 1.5 cups of boiling water over the rice. It will come to a rapid boil. Stir, cover with the lid, & turn the heat all the way down. A gas burner should be barely going. On an electric burner, use the lowest setting.
Set your timer for 15 minutes. Do not take the lid off the rice during this cooking time.
Once the timer goes off, turn off the burner but LEAVE THE LID ON THE RICE FOR ANOTHER 5 MINUTES.
After the full 20 minutes, remove the lid, and fluff the rice with a fork.
If you prefer, omit or change the seasoning as desired. Just remember that salt it key. You can also use veggie or chicken broth for more flavor. Add onion, herbs, & almonds or pine nuts for a pilaf.
Store leftover rice in a container in the refrigerator.

Enjoy!