Make Something New Every Day


This blog is inspired by all those who love to cook, whether experienced or not, and who continue to experiment with new ideas & ingredients, and best of all, share their passion with others.

The first entries are recipes prepared by the students of Lionel Wilson College Preparatory Academy in Oakland, CA. Fifteen students with varying cooking experience participated in my weekly workshop (via Tutorpedia), and successfully prepared various meals, snacks, and baked goods as part of an after-school program.

Along with the recipes from that class, I will continue to add new seasonal items, spanning every genre of the culinary world, as well as a helpful list of links to recipes, instructional videos, and places to shop and volunteer in your area.

Feel free to ask me questions and share your recipes and ideas as well. I look forward to cooking with you.


May 4, 2014

Radish Leaf Pesto


During the spring and summer, I often make my own pestos. Store bought varieties tend to have an oxidized taste, too much oil, or (IMO) the wrong combination of ingredients. Since I am fortunate to live in an area with an abundance of inexpensive fresh produce, I enjoy experimenting with new dishes, focusing on economy (both money, and making the most of each ingredient). A lover of basil (who isn't??), I typically make basil pesto. 

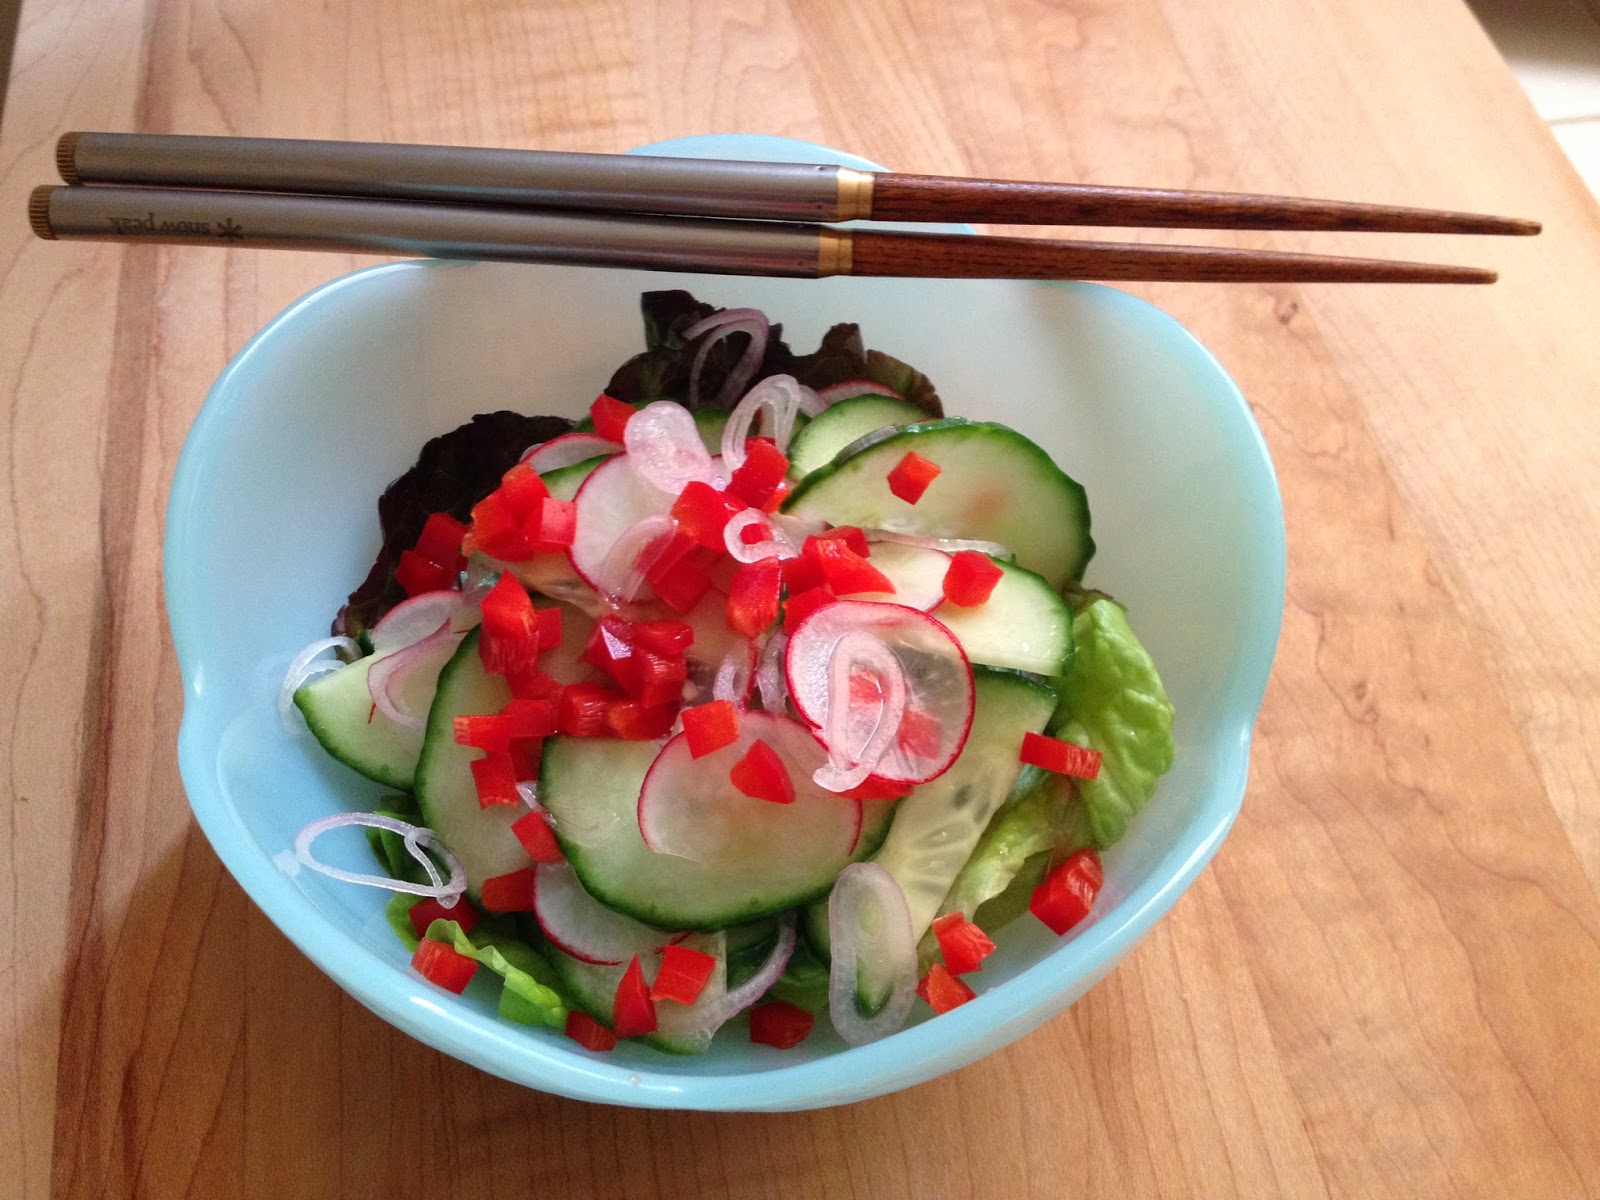
Recently, I bought a few bunches of beautiful spring radishes (some of which I used in a Thai cucumber salad). To make the radishes last, I snipped them off their stems and refrigerated them in a container filled with cold water. 

Just before I tossed the greens into the compost bin, I had an epiphany. Why not use the leaves in something? Knowing that some veggie extras are inedible, I did a quick Google search, and got the "green" light to proceed. I tasted a leaf. It tasted...green. Not bitter, not sweet, just sort of grassy and fresh. Because the leaves have sort of a neutral taste, I decided to toast up some pistachios to give the pesto a nutty flavor, as well as a little crunch. Other than that, I stuck to the usual pesto ingredients: olive oil, salt & pepper, parmigiano reggiano, and a little lemon juice. 

The result (as you can see above) was a vibrant pesto, that not only tasted bright and lovely, but kept its green color and freshness after several days in the fridge. Considering that a bunch of radishes costs about 50 cents, this radish leaf pesto is a great way to stretch your dollars, while adding a tasty and healthy touch to your meals. 
Look for radishes with fresh, green, undamaged leaves. Farmers' markets or stores with high turnover are your best bet. Whenever possible, buy organic, or ask where and how the radishes were grown. Obtaining a Certified Organic label is very time-consuming and expensive. Many farmers grow clean produce, without an organic seal of approval. 
Ingredients
Greens from 2 bunches of fresh radishes
About 1/3C of shelled pistachios (Trader Joe's 50% less salt, or Whole Foods bulk are good choices)
Olive or Grapeseed oil
Parmigiano Reggiano (Trader Joe's and Costco have great prices)
Kosher salt, & pepper
Lemon Juice 

Preparation
In a dry pan, toast the shelled pistachios until they're golden and fragrant. Remove from heat and let cool. 
Toasted pistachios
Remove the stems, and float the radish leaves in a large bowl of cold water. Gently push the greens under the surface of the water every so often. The dirt will settle to the bottom of the bowl. (We're in a drought! You can use "dirty" water on your plants, or to flush your commode. Pouring sandy water down the sink can lead to clogging.) 

Either spin the leaves in a salad spinner, or place them in a clean kitchen towel, wrap up the corners, and give it a few shakes to dry the leaves a bit. (Slightly wet leaves will help produce a smooth pesto.)  

Add the leaves to a blender, food processor, or my favorite go-to, the Mini Prep. Sprinkle about 1/4t of kosher salt (you can always add more later), some fresh ground pepper, the pistachios, the cheese, and drizzle over a few tablespoons of oil. Pulse the blender or processor at first, then let it go for a few seconds. Scrape down the sides, and repeat. If the pesto looks chunky, but a little dry, add some more oil. Once it starts to resemble a pesto, stop the machine and taste. Add a little lemon juice, and adjust the seasoning. Give it one more blend, then transfer the pesto to an airtight container and refrigerate until needed (up to 3 days), or serve immediately. 


My beloved Mini-Prep holds 3C of goodness, has a reversing smartblade, and only cost about $35. It has a ton of uses. Check out the link for color options, more info, and a brief instructional video from the good people at Cuisinart. 

Other than a sauce for pasta, pesto can be used on potatoes, as a spread on a sandwich, or however you like. 

Make & Freeze
You can also prepare and freeze a pesto for later use. I like to freeze it in ice cube trays, then pop them out and store them in freezer bags. The cubes defrost easily, and are great to keep around for dinner "emergencies". 

May 3, 2014

5 Minute Thai Cucumber Salad


OK. 5 minutes depending on your knife skills. But it's quick. And easy. And way cheaper than anything you'll get at a restaurant. For those who need their vegetables sugar-coated, this is a delicious and healthy way to get at least one serving a day.

At the very least, you can make this with 3 ingredients: cucumbers, vinegar, and sugar. With a couple more ingredients, it's fantastic. 

Clockwise from left: Shallots, radishes, cucumbers, bell pepper
Preparation
Very thinly slice one small shallot. Add to a medium-sized bowl. Drizzle with rice vinegar and sprinkle with a little sugar. Stir, and let sit while you prep the other vegetables. 

Slice a 2-3" piece of English cucumber in half lengthwise, then slice thin half moons. 
Slice a couple radishes as thinly as possible.
Dice a little red bell pepper. 
Stir the cucumber and radish into the shallots & vinegar. Adjust seasoning (if it's too acidic, add a little more sugar). Garnish with the bell pepper. Serve immediately. 

This salad is best made fresh, as the veggies will become limp if left sitting for more than an hour. Keeping rice vinegar in the pantry is a great idea. It's soft and balanced, makes great dressings, and adds dimension to all sorts of dishes. 

Fried Rice...Russian Easter Style


Restaurants are making a killing selling you a carton of leftovers for about $8. 

Next time you find yourself with leftover meat and rice, make a honkin' batch of fried rice, and feed your whole family for a fraction of the cost (and without wondering how much sodium or "mystery ingredients" may be lurking behind that carrot). 

My family only cooks a ham twice a year - at Easter and Christmas. We eat meat so rarely that when we do, we indulge in a pricier nitrite-free ham from a good butcher. And we all want leftovers, so we tend to overbuy (even for a Russian family, hell-bent on overfeeding our guests). This Easter, my Mom* wanted to try a new method she had read about - braising the whole ham in apple cider and spices. This resulted in a moist, delectable flavor, deeply spiked with apple, clove, and allspice. 

Since my Mom is highly praised for her beef Stroganoff, we had a sort of "turf & turf" Easter buffet. Cold ham served with an assortment of salads, and hot Stroganoff served with rice. It was a very warm day, and one of those years when Russian Orthodox Easter falls on the same day as the Gregorian Easter. This meant more leftovers than usual, which was fine with everyone who went home with lovely parting gifts of meat and Easter bread. 

Having cooked and cleaned for days ahead of our annual party, I was not in the mood for preparing anything at all time consuming for myself the following week. And then it hit me. Russian + Chinese makes sense in my family. After all, my Father's family came through China on their way to the U.S. My paternal grandparents were born in Shanghai. And with this Easter falling on April 20th (the anniversary of my Great Grandmother's passing), nothing felt more right than using Russian Easter leftovers to make Chinese food for an American girl. 

Now, contrary to the pomp that precedes the instructions, preparing fried rice can be quite simple and quick. I opted for using fresh veggies, which I usually have in abundance. Most people have a carrot lying in wait in the fridge, and if that bag of peas hasn't been in & out of the freezer for years of bruise-tending, it should be good to go as well. I'll list the ingredients I used, but as always, feel free to improvise. The best way to a successful dish is to prep everything ahead of time so that when you're cooking, you can work quickly. 

Pork Fried Rice
2-3T soy sauce
2T rice vinegar
1t sesame oil
pinch of sugar

3T grapeseed or vegetable oil

1C diced leftover ham
1/2C+ thinly sliced carrot
1/2C+ peas (either blanched fresh, or thawed frozen)
3-4 crimini mushrooms, sliced 
1-2 eggs, lightly beaten

1 green onion, thinly sliced
2-3C leftover white rice
pickled ginger garnish

Whisk together the first 4 ingredients, and set aside. 

Heat a large skillet or wok on high, and add the oil. 
Saute the ham until golden on the edges. Add the carrot and mushroom, and cook about 2 minutes, stirring often to avoid burning. Add the peas to heat through. Make a well in the center of the pan, and add the egg, stirring to scramble, then mix in with the other ingredients. Add the green onion and rice, stir to combine & heat through. Pour the soy sauce mixture evenly over the rice, and heat through for about a minute. 

Serve immediately, topped with julienned pickled ginger. 

Allow leftovers to cool to room temperature before storing in the fridge. 

Note: The special braise on this ham gave this dish a wonderfully authentic Chinese flavor akin to 5-spice. I have made fried rice with regular ham, chicken, shrimp, and tofu - all delicious. Have fun improvising! 


*The ham was Mom's idea, but the credit goes to my brother-in-law, who prepared and sliced the ham to perfection. 

April 15, 2014

It's the Time of the Season for Loving...Your Vegetables!


Spring. A time for renewal. And nothing quite compares with the joy of going to the market and filling a basket with beautiful fresh produce. I hope my Mom is proud that I have always loved my fruits and vegetables. The woman cooked for a family of six every day, and we seldom ate anything processed (though we begged, and occasionally got our way after wearing the poor thing down). 

If you would like to add more fresh produce to your diet, keep an eye on this blog. Throughout the spring and summer I will be adding posts for simple and delicious vegetarian items, using seasonal ingredients in both traditional and unexpected ways. I love trying new things in the kitchen, and hope I can inspire you to do the same. 
I welcome your questions and comments!

Where to Buy
One of the reasons I choose to live in a bustling area of San Francisco, is the ability to shop for my produce daily. Just a few blocks from my home is a wonderful Mediterranean market featuring oodles of varieties of fresh produce, and a surprisingly vast selection of dairy and pantry items. My family has shopped at this market for decades because the owners are there every day, ensuring the prices are as enticing as the cornucopia of goods. 

I encourage you to explore your neighborhood. Grab some bags, hop on your bike, or stroll the streets to see what surrounds you. Check the right side of this blog for suggestions on where to shop, find farmers' markets, and see what's in season in the San Francisco Bay Area. 
Have a happy and healthy day!

February 13, 2014

Jam Jar Vinaigrette

I never could stand store-bought salad dressing. But if I make a big batch of my own, and buy a honkin' tub of organic greens, I'm sure to eat my vegetables every day. The sweetness of the jam balances the acid from the citrus and vinegar. Herbs, shallot, and ginger add layers of flavor and dimension, making this vinaigrette (and hence, your veggies) irresistible. 

This is may favorite combination of ingredients, you can have fun using different vinegars, jams, and herbs. The measurements I give are just guidelines. I encourage you to taste as you go, and adjust whatever you like to suit your palate. 

Shake it Up
Add all ingredients to the jam jar, shake well to dissolve all the jam, and adjust ingredients to taste. If you have time, make it ahead and allow the flavors to develop in the vinegar before adding the oil. Otherwise, add oil to taste. I like about 3 parts vinegar, etc. to 1 part oil. 

Rice Vinegar - about 1/4C
White Balsamic Vinegar - about 2T 
Meyer Lemon Juice - about 2T
Orange Juice - about 3T 
Red Wine - 1-2T
Shallot - 1T finely minced 
Ginger - about 1t, either in a chunk or grated
Kosher Salt - about 1/2t
Grapeseed Oil - about 1/4C (grapeseed oil is just as healthy as olive oil, but has a milder flavor, and doesn't coagulate as much in the fridge)

Herbs: You can add a sprig of thyme to the jar, and the flavor will infuse the dressing, or mince a few leaves of basil or tarragon. 

So next time you polish off a jar of your favorite jam, save the jar and turn it into a cup of goodness. 
Let sleeping ingredients steep before adding oil.


December 6, 2013

No Knead to Panic. Easy Buttery Dinner Rolls.


I've tried various recipes and techniques for yeast-based dinner rolls, and so far these are my top seed. The dough mixes up in minutes and requires no hand kneading after its time in the mixer. The only real "work" is dividing the risen dough into 24 equal pieces and shaping them into balls— and as I proved on the eve of Thanksgiving, this task goes quickly and is way more fun when shared with a friend. 

Store the shaped, unbaked rolls in the fridge overnight, then bake the rolls fresh just in time for dinner. As the dough rises whip up some compound butters. Fresh chive butter makes these already addictive rolls irresistible. 

Make the Dough
1 Packet Yeast (1/4oz, 2 1/4t)
1/3C Sugar
1/2C Warm Milk (heated to 110-115')

6 1/2C AP Flour
2t Fine Sea Salt
1.5 Sticks Unsalted Butter, softened (plus 1 stick melted for brushing)
1 Egg, lightly beaten
1 1/4C Milk, room temp 

Start the Yeast
Warm 1/2C milk in a liquid measuring cup. Gently stir in the sugar and yeast, and let it sit for 5 minutes until foamy. 

Mix the Dough
Add the yeast starter to a mixing bowl fitted with a hook attachment. Stir in the softened butter, half the flour, and half the remaining milk. Start slow, then mix until incorporated. Mix in the egg. Then add the rest of the flour and milk. Start slow, then mix for a few minutes until the dough comes together and pulls away from the bowl. It will be sticky. 
The dough before the 2nd batch of flour and milk are added.
Let it Rise! 
Dump the dough into a large oiled bowl, cover loosely with plastic, and let rise in a warm place (not hot) for about 2 hours until the dough has doubled in bulk.
The dough before rising.

Prep the Pans, Shape the Dough
Line a baking sheet with parchment. On a clean work surface (a floured wooden cutting board or clean counter top) dump out the doubled dough, and gently punch it down and give it a few light kneads to get the air out. Using a knife or bench scraper, cut the dough in half. Then divide each half into 12 equal pieces (24 total). Shape each piece into a ball by gathering the edges together, pinching them to seal. Then roll the ball in a tight circle cupped in your hand, against your work surface to create a smooth ball. Distribute the rolls evenly spaced on the lined pan. Cover pan with plastic wrap and store in the fridge for 8 hours or overnight.


To Bake
Remove pan from fridge and leave at room temperature for one hour or more before baking. Preheat oven to 375'. Brush the tops of the rolls with melted butter and sprinkle with kosher salt or fancy-pants salt flakes. Bake for about 20-25 minutes until deep golden brown. Turn the pans after about 15 minutes to ensure even baking. Remove the pan and brush the rolls (again!) with more butter. Cool on rack at least 10 minutes before serving. 

Rolls can be baked at least a day ahead. 

Storage
Store remaining cooled rolls in a ziploc bag or airtight container for up to 1 week. Rolls can also be frozen and reheated in foil at 300' until warm.

Chive Butter
Cream 1C (2 sticks, 1/2#) unsalted butter until soft.
Stir in 2-3T finely minced chives.
Season with a little kosher salt to taste.
Transfer to a small serving bowl or ramekin. Cover with plastic and refrigerate, or serve immediately. Store extra butter covered in the fridge for up to 3 weeks. Note: Compound butters that contain fresh herbs or vegetables can spoil faster than regular butter. If you don't need the extra butter for a while, wrap it tightly in parchment, then plastic wrap, then a Ziploc freezer bag. Thaw in the fridge or at room temperature before serving. Do not refreeze, or eventually it will turn gross. 

June 14, 2013

Best. Cookies. Ever.

or just really good cookies that someone brought a lot of to work. people like lots of free cookies. I like to bake cookies. here we go.

this is a very basic "chocolate chip" cookie recipe. you can add about 3C of assorted goodies to the basic dough. a mix of dried fruits, chocolate and nuts is a typical "cowboy" cookie. oats soak up a bit more of the moisture, so you'll get a denser cookie with oats.
you wanna eat a cowboy? giddyup. 

1C unsalted butter
3/4C each, white and light brown sugar
2 XL eggs
1t vanilla
2 1/3C unbleached white flour
1t salt
1t baking soda

and in this case...
3C total of semisweet chocolate chips, dried cherries, shredded coconut, and toasted pepitas. When dry toasting the pepitas on the stove, I add about 1/2t of kosher salt. Let them cool before stirring them into the dough.

Butter works best when cool room temperature. Better to cream it a bit longer when cool than let it get greasy. Once beaten until fluffy, add the white sugar...beat...then the brown...beat some more. Scrape down the sides of the bowl and beat in one egg until combined and the dough is fluffy. Beat in the 2nd egg until the dough is as combined as its gonna get. Stir in the vanilla, then stir in the flour mixture. If using a stand mixer, pulse the switch between "off" and the lowest setting to "pulse" in the flour. If you just let 'er rip, your flour will fly out of the bowl and all over you and your counter.

Barely stir in the flour. Then add your goodies and stir a bit more. Turn off the mixer, scrape the dough off the paddle, and use a spatula or wooden spoon to give the dough a final stir to incorporate the ingredients.

At this point you can chill the dough, or scoop & chill the dough, or just scoop and bake the cookies, then systematically eat them until you want to die a happy, chocolatey death. Using a golf ball-sized ice cream scoop will yield evenly-sized cookies. Scoop and level the dough to fit 12 cookies to a standard baking sheet.

Line baking sheets with parchment paper for even baking and easy clean-up. Bake at 350' for anywhere from 10-14 minutes, depending on your oven. Slide baked cookies' parchment onto cooling racks, and store cooled cookies in airtight containers for up to a week.

#nomnomnom