Make Something New Every Day


This blog is inspired by all those who love to cook, whether experienced or not, and who continue to experiment with new ideas & ingredients, and best of all, share their passion with others.

The first entries are recipes prepared by the students of Lionel Wilson College Preparatory Academy in Oakland, CA. Fifteen students with varying cooking experience participated in my weekly workshop (via Tutorpedia), and successfully prepared various meals, snacks, and baked goods as part of an after-school program.

Along with the recipes from that class, I will continue to add new seasonal items, spanning every genre of the culinary world, as well as a helpful list of links to recipes, instructional videos, and places to shop and volunteer in your area.

Feel free to ask me questions and share your recipes and ideas as well. I look forward to cooking with you.


August 17, 2012

It's Summer. Chimi Some Steak!


Simple, balanced flavors of lemon, garlic, chilies, vinegar, and fresh herbs are all you need to make an irresistible marinade & sauce for steaks, poultry, fish, or vegetables. 

Baja steaks from our own local United Markets are a great value at under $6/pound. Tender cuts averaging under a pound each, these are ideal for dinner parties small or large. Although they have little fat, they are tender as a filet, without the crazy price. 

Chimichurri

4 cloves garlic 
1t kosher salt; more as needed 
1 bunch flat-leaf parsley, stemmed and chopped (about 1-1/2 cups, lightly packed) 
1t dried oregano 
1 small carrot, finely grated 
1/2t freshly ground black pepper 
1/2t dried red chile flakes 
1/2t grated lemon zest 
5T white-wine vinegar or distilled white vinegar; more to taste 
5T cold water; more as needed 
1C extra-virgin olive oil  (use less if you prefer)

Finely chop the garlic on a cutting board. Sprinkle the salt over it and repeatedly scrape the flat side of the knife over the garlic to mash it to a paste. Scrape the garlic paste into a medium bowl. Add the parsley, oregano, carrot, pepper, chile flakes, and lemon zest and mix. Add the vinegar and water and mix again. Whisk in the oil. Taste and correct the seasonings, adding salt, vinegar, water, or chile flakes: the sauce should be highly seasoned.

Place the steaks in a dish, and liberally coat with some of the chimichurri, reserving the rest for after grilling. Marinade for at least 1 hour, or overnight. Flank steak or skirt steak are also ideal choices for this treatment. 

Grill steaks over coals to preferred doneness. Baja steaks are ideally cooked medium-rare since they have little fat. Remove steaks from the grill, coat with more chimichurri, and let rest loosely tented with foil for 5-10 minutes before slicing. 

Excellent with summer squash, potatoes, atop a salad, or as the showstopper in your quesadillas or tacos. 

Store leftover steak in your belly. 


Recipe courtesy of Fine Cooking Magazine

August 10, 2012

Oh, dark mother of all that is caramel...

Tonight, the secret's out. Tonight you will make the best caramel sauce you've ever tasted. 

The secret? Brown sugar. How come you taste so good?

Since this process is more technique than skill, I'll start with the photos, and add the recipe and instructions below. 
Dissolve the sugar in the water. Using a low flame will speed up the process. 
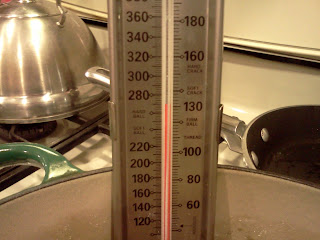
Are we there yet, Papa Smurf? It's getting really dark, and I'm scared. Don't worry. Just keep swirling, and be patient. Waiting for 280' is absolutely necessary. The sugar needs to get hard enough so that it sets into a thick, rich consistency. It will be worth it. 

The good news? Brown sugar contains molasses, which prevents the caramel from crystallizing. It also imparts a butterscotch flavor, which makes the caramel irresistible. 
Almost there...get ready to rumble.
 Using a sharp knife, split the vanilla bean in half lengthwise. Flip the blade, and use the back of the knife to carefully scrape out the seeds. Hold onto the end of the bean tightly. Push down, and move the blade with slow confidence. 
Don't forget the butter & salt! 
(those are vanilla seeds on the butter...)
 Stir the cream in carefully. The colder the cream, the more it will boil up as the water evaporates. 
Using a jarring funnel will help keep the rims of your jars clean. 


RECIPE

2C light brown sugar (the trader joe's organic is rad)
3/4C water
1/2 a vanilla bean, scraped of its seeds
1 1/2C heavy cream
1/2 stick of butter
1/2-1 teaspoon kosher salt (to taste)

Before we start, I am warning you to be extremely careful when cooking sugar.  The best way to avoid injury, is to read through the recipe a couple of times, and get all your ingredients out & measured before you begin. Keep a pair of thick oven mitts (preferably with grip), or Ove' Gloves (Kevlar) handy. 

Careful.

You will see this word many times below. I mean it.

Use a large, heavy pot (4Qt Le Creuset or stainless steel with a reinforced bottom). Make sure the pot is beyond clean, with no burn spots. This caramel will become insanely hot, and will take whatever's stuck to your pot with it. 

Dissolve the sugar in the water. Use a heat-resistant silicone spatula. A quality one should not melt. If your sugar is coarse or has lumps, use a low flame under the pot, and keep stirring to dissolve the sugar. Once it's there, turn the heat up to medium-high, and clip on a candy thermometer. Add the scraped out vanilla pod, but reserve the seeds for later.

The temperature will quickly climb to about 220', then will take about another 10 minutes or so to reach 280'. You must let the sugar get to this stage in order for your caramel to set to the gooey consistency you desire. 

As the sugar boils, it may initially bubble-up violently. This is why you need the too-big pot. Occasionally lift the pot off the fire (using oven mitts), and carefully swirl the mixture to even out hot spots and avoid burning. 

Once the temperature climbs to 280', turn the heat off, and carefully remove the thermometer. Best to put it into a container full of water, or it will stick to whatever it touches. 

Carefully pour in the cream. It can spatter and boil up if the cream is very cold, so stand back. Once it's calmed down, turn the heat back on, and carefully stir the mixture with your silicone spatula. Initially the caramel it harden and clump up, but after a few minutes of stirring, it will dissolve back into a liquid state. Keep stirring until all the clumps are dissolved. 

Turn the heat off. Stir in the seeds from the vanilla bean, the salt, and the butter. Stir until the butter is melted and incorporated. The caramel will look impossibly runny, but it will set & thicken as it cools.

Place a jarring funnel over your clean jars, and carefully fill them.


Let the caramel cool to room temperature before adding lids and refrigerating. 

Store refrigerated for up to a month, or freeze for up to 6 months. 

Makes just under 3 cups.